
Proctor Your Own Midterms/ Finals
In order to prepare your students to take the exam on Zoom, please send them the following instructions:
You may only use a computer or laptop. No iPads, mobile devices, or Chrome books may be used.
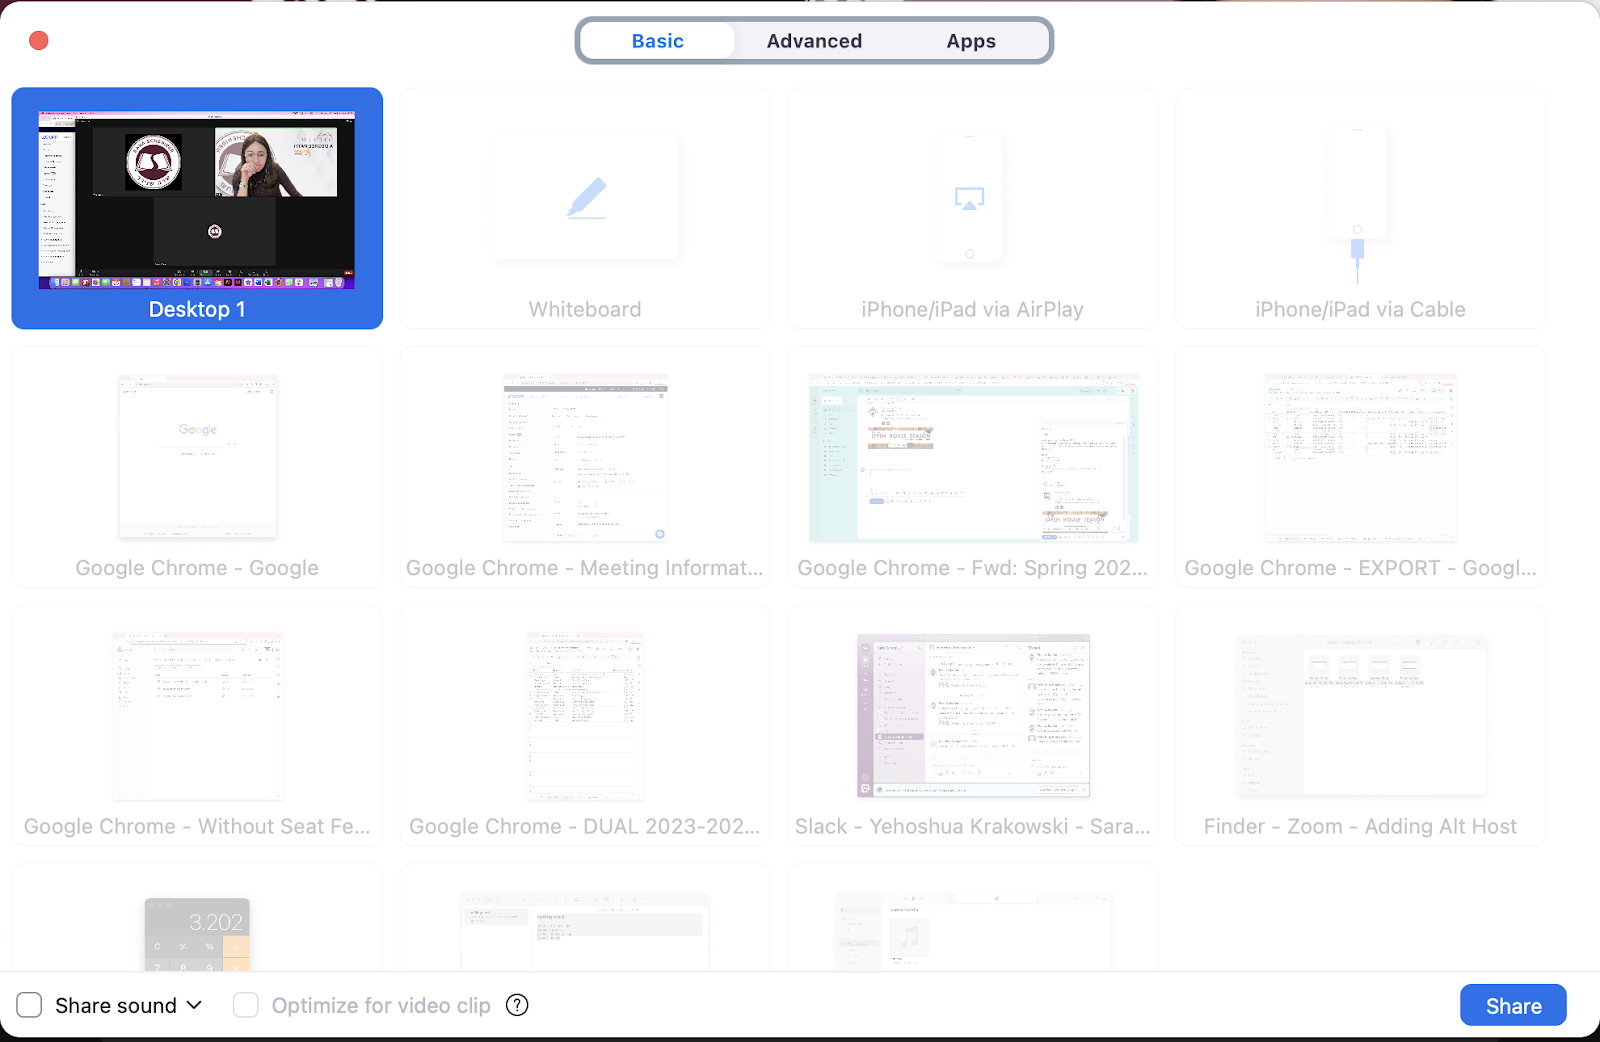
You will be required to share your entire computer screen (including the task bar at the bottom of your screen). Please test this out on your device prior to the session to be sure that it works for you. At the bottom of your Zoom screen, click Share Screen. Choose the picture on the top row, all the way to the left (it may be designated as “Desktop” or “Screen”).
You must click here for a tutorial that explains how to prepare your computer before coming to Zoom. If you need additional help, please email itsupport@sarasch.myiqsolutionsllp.in.
You will be required to keep your microphone unmuted for the duration of the exam. Therefore, you must be in a quiet room with no background noise while taking your exam.
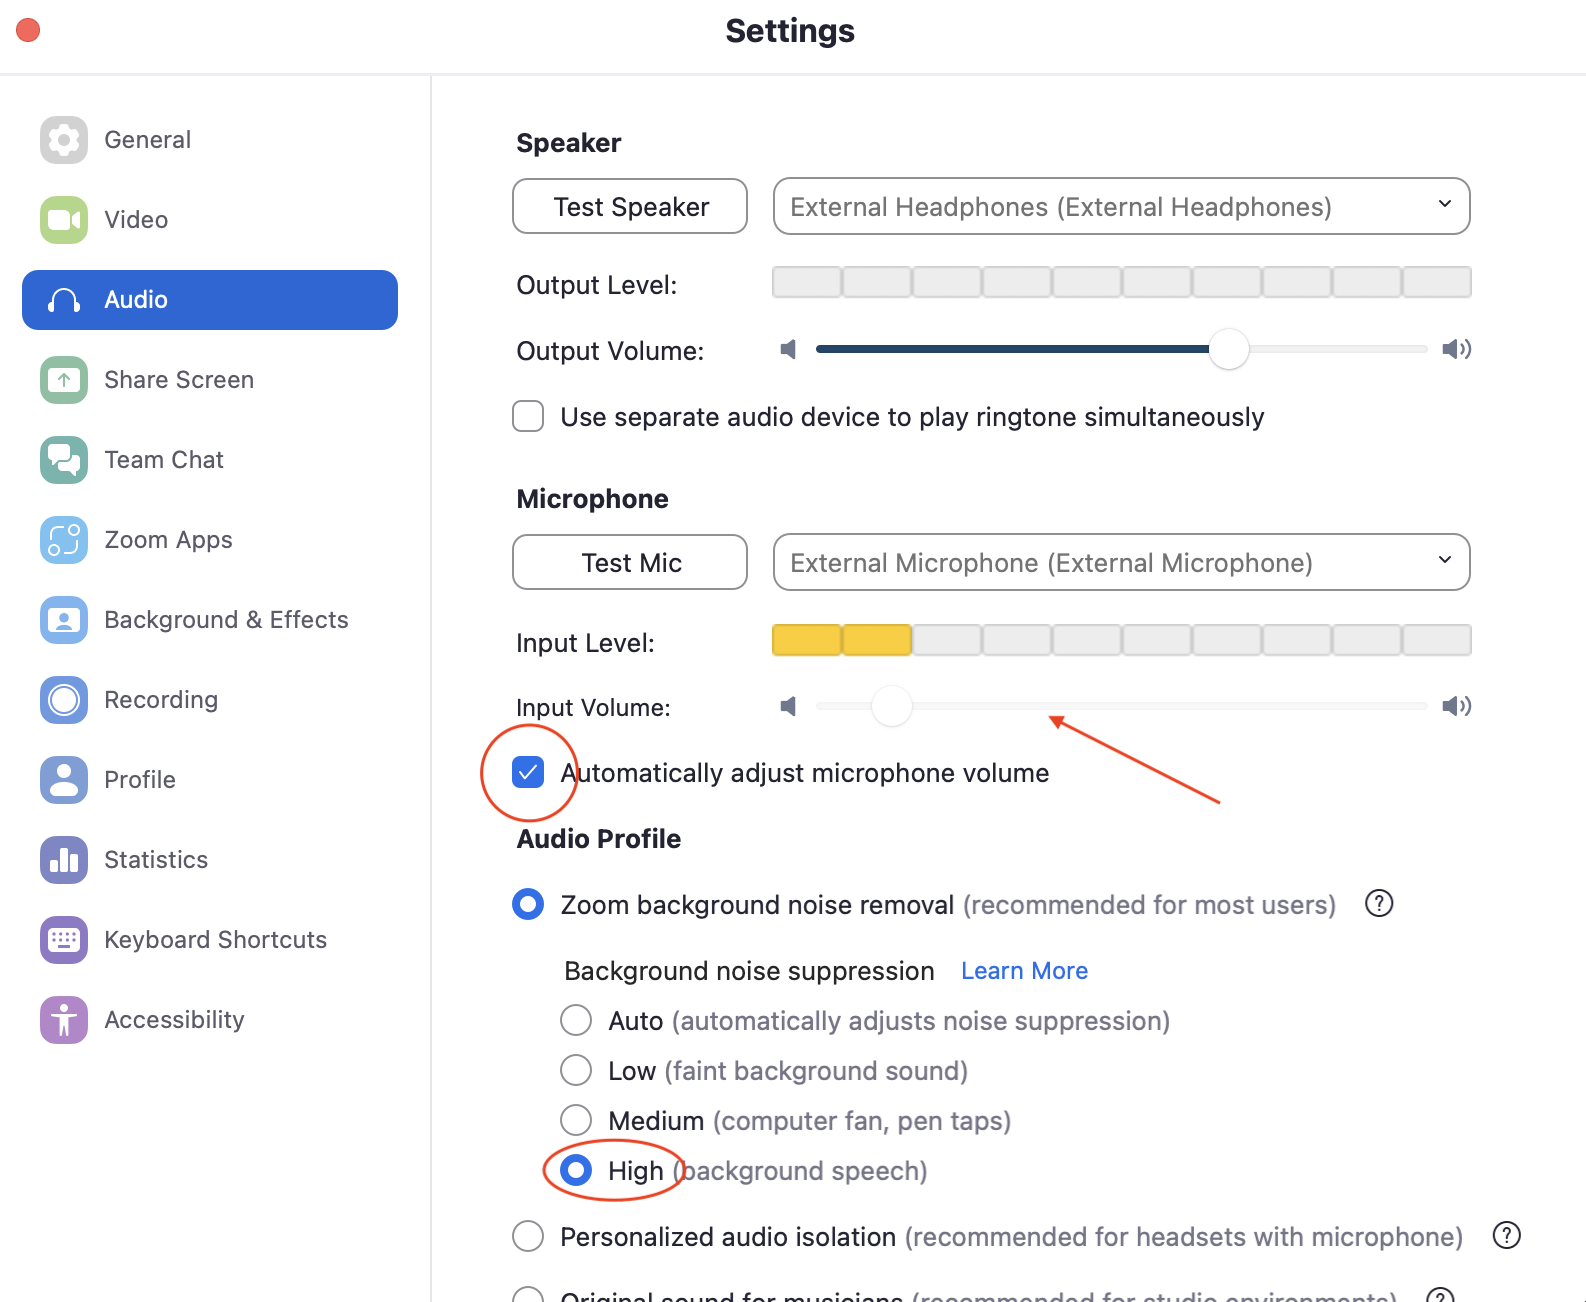
Make sure you have enabled the setting “Zoom Background Noise Removal > High” in your Zoom Audio Settings.

You may not exit the Zoom session until your test is submitted on Blackboard/Canvas and the instructor gives you permission to leave. If you leave before this, you will receive a 0 on the exam.
Please follow the instructions below to proctor your exam.
For assistance, reach out to itsupport@sarasch.myiqsolutionsllp.in.
Upon starting the Zoom meeting (when you are ready to start the exam):
Enable focus mode in the “More” menu in the in-meeting toolbar on the bottom of your screen. (In case you do not see the option to start Focus Mode, reach out to itsupport@sarasch.myiqsolutionsllp.in.)
Turn off chat settings so that students cannot chat with each other.

Enable multiple participants to share their screens by clicking on the arrow next to “Share Screen” and then clicking “Multiple participants can share simultaneously.” (Students will not be able to see each other’s screens as long as you’re in Focus Mode.)
Ask each student to share their surroundings by manipulating their camera to show their entire work area.
Ask each student to share their entire screen.
Student should select the top left screen that appears when they click “Share Screen.” They should not select individual window(s) to share.
Once the student’s entire screen is shared, you should be able to see the toolbars on top and bottom of their screen, and check that no other apps are open.
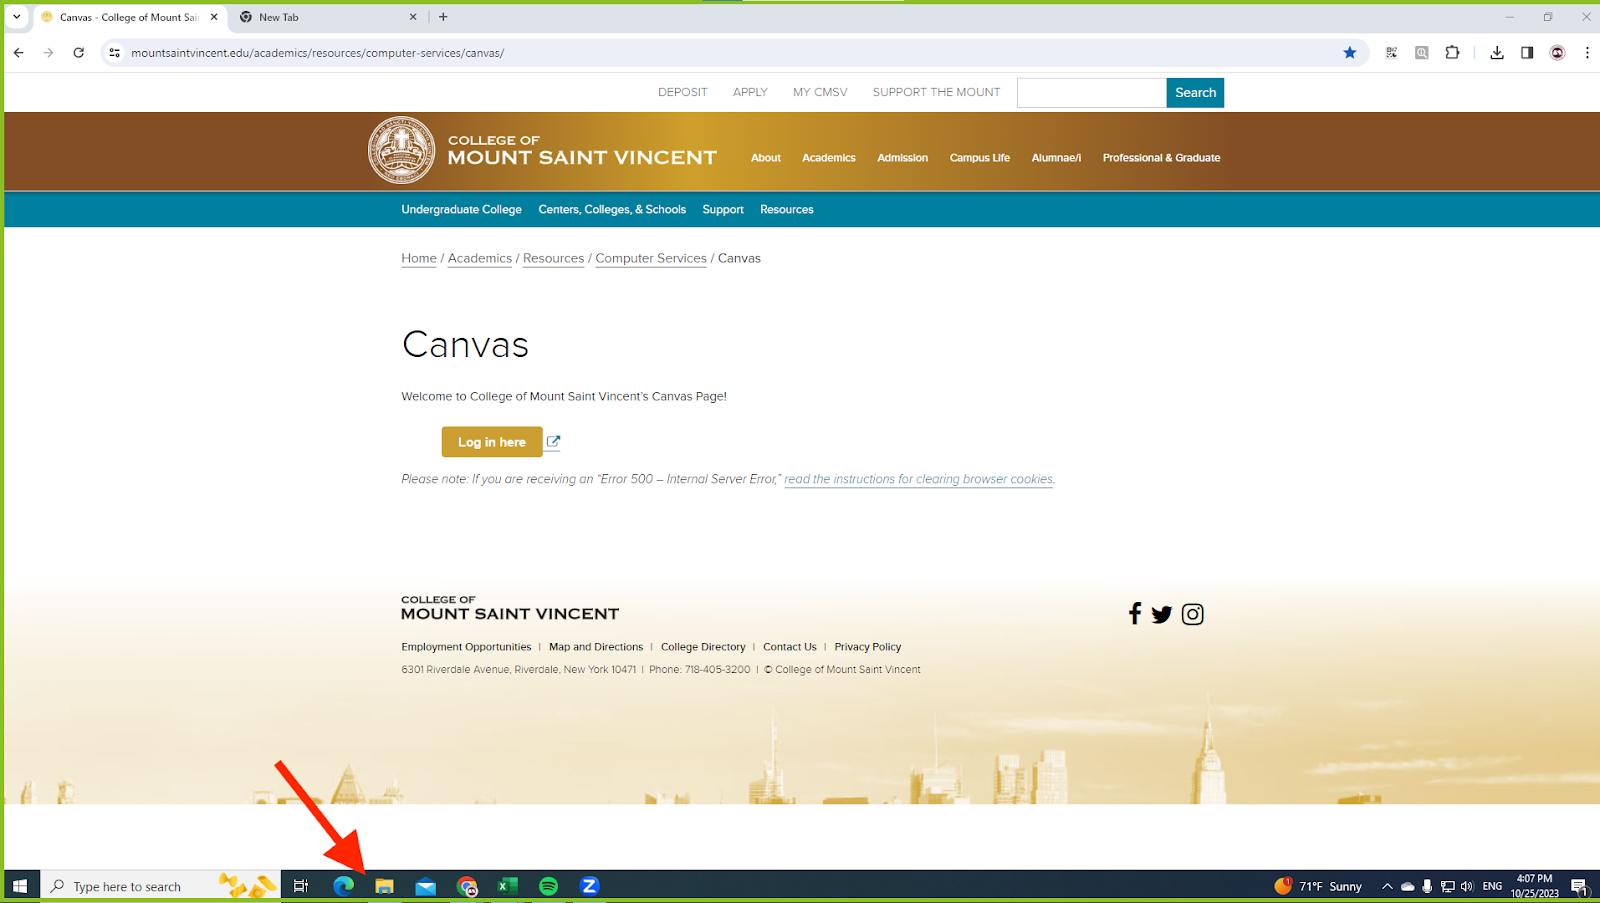
If a student’s toolbar is not visible, click here for instructions.
Make sure the student has turned off all of the following settings:
In computer settings:
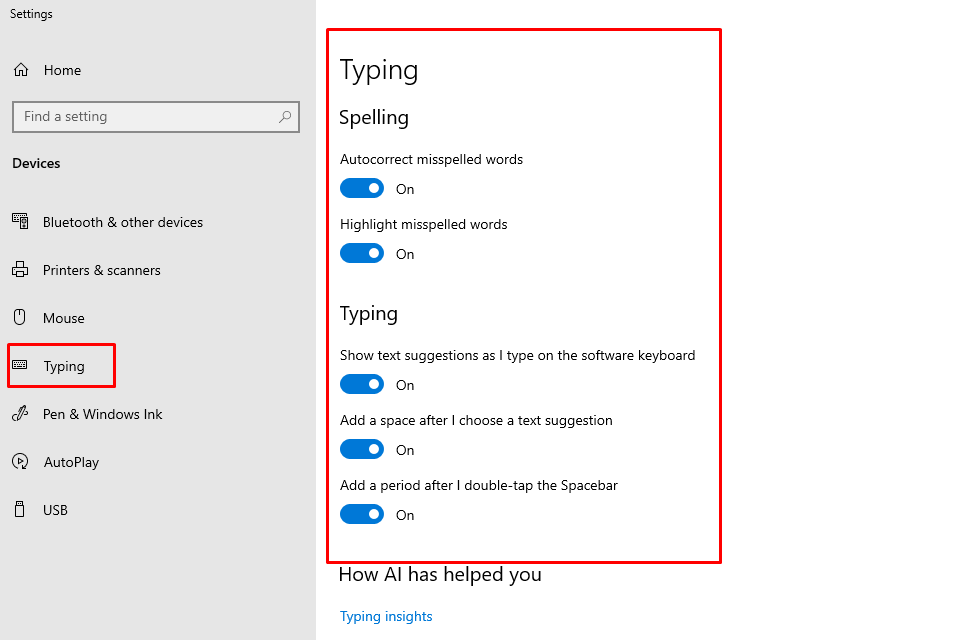
For Windows devices– Go to Settings > Typing and click the blue toggles to turn OFF all spelling and typing suggestions.
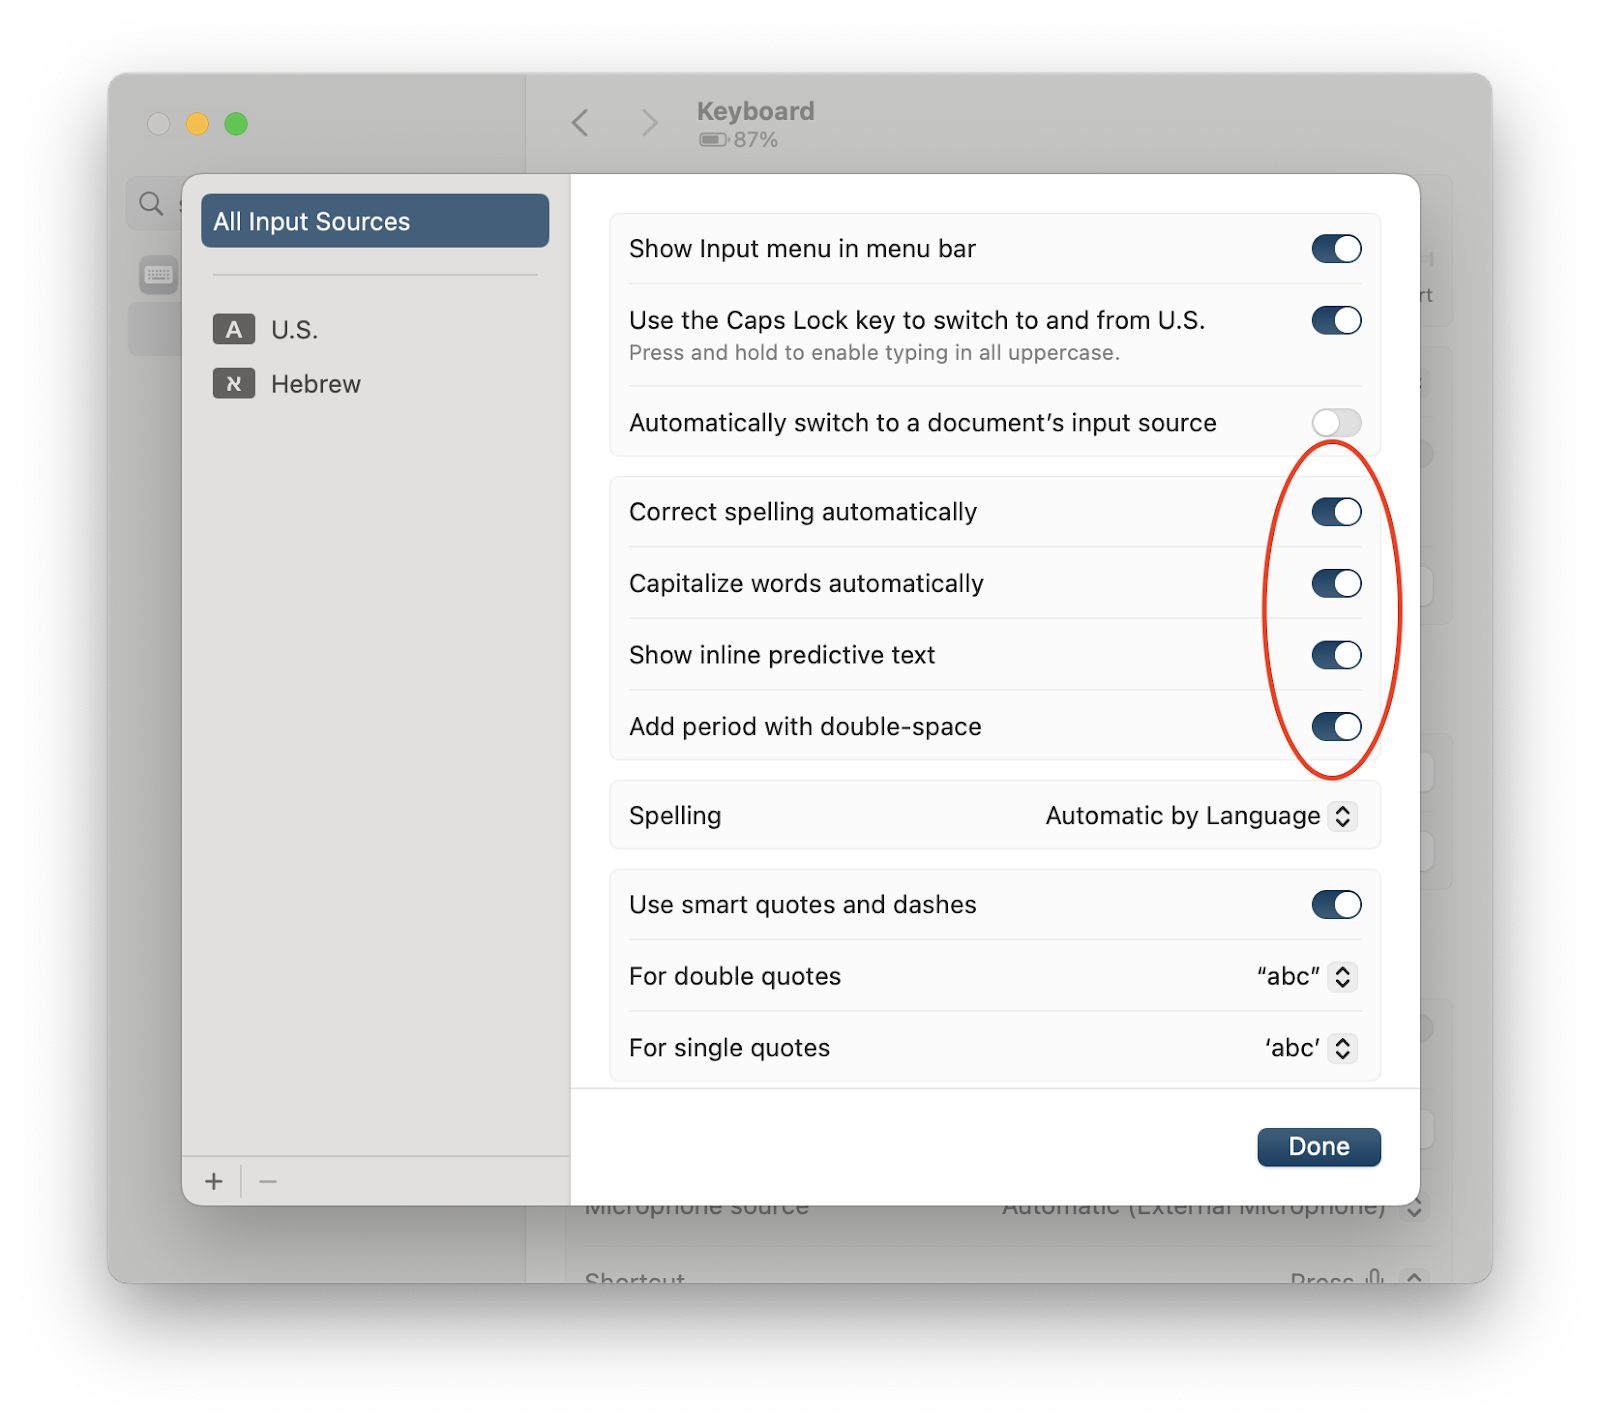
For Mac devices– Go to System Preferences > Spelling & Prediction and click the blue toggles to turn OFF all spelling and typing suggestions.
In Google Chrome:
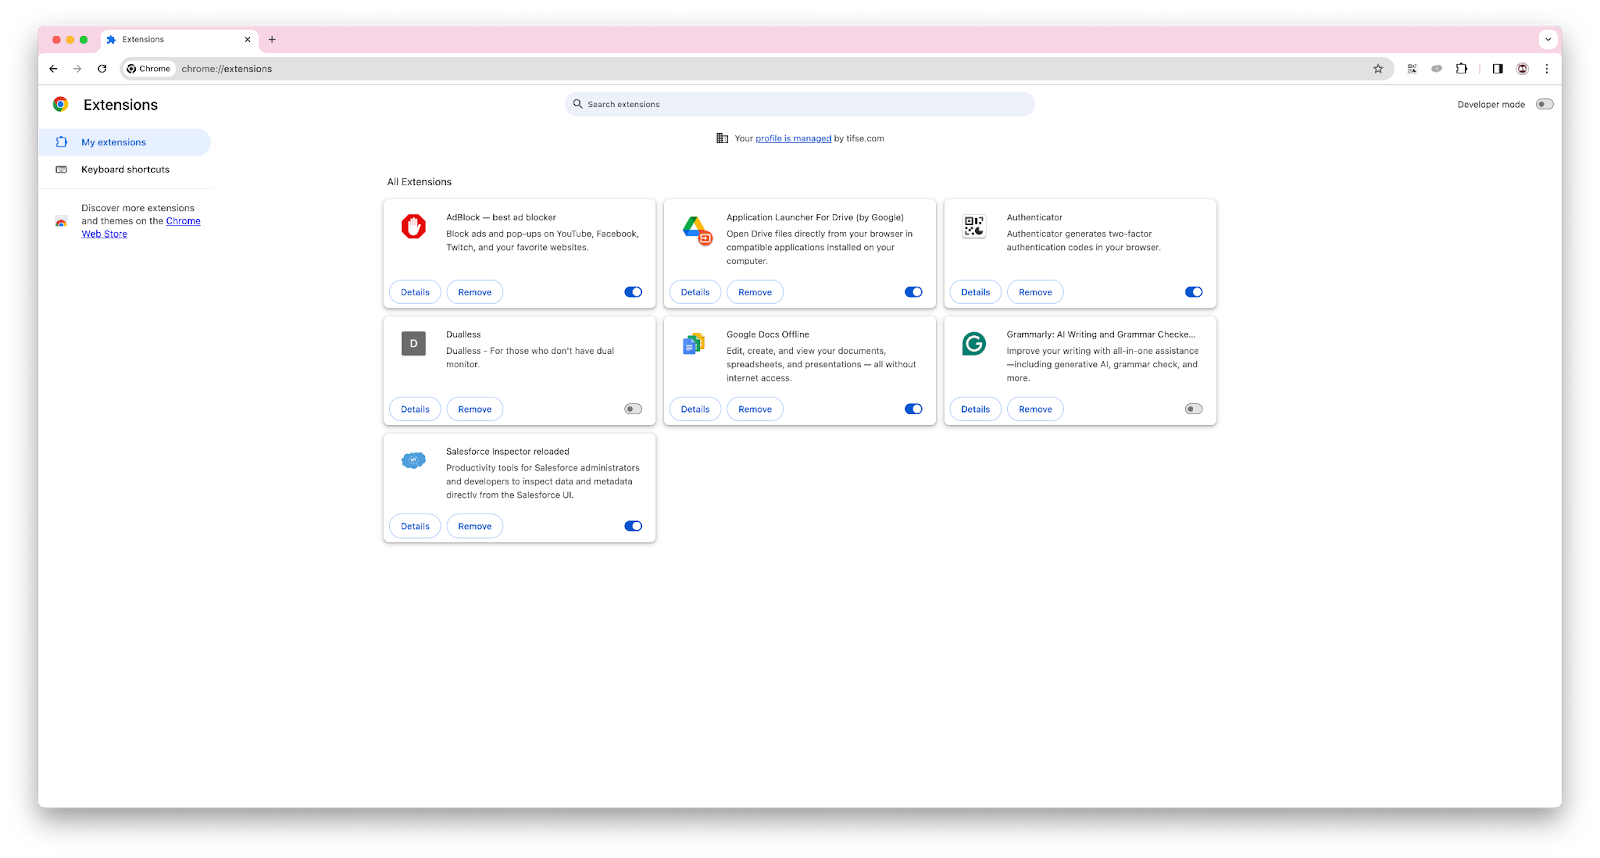
chrome://extensions/ → click the blue toggles to turn OFF all extensions
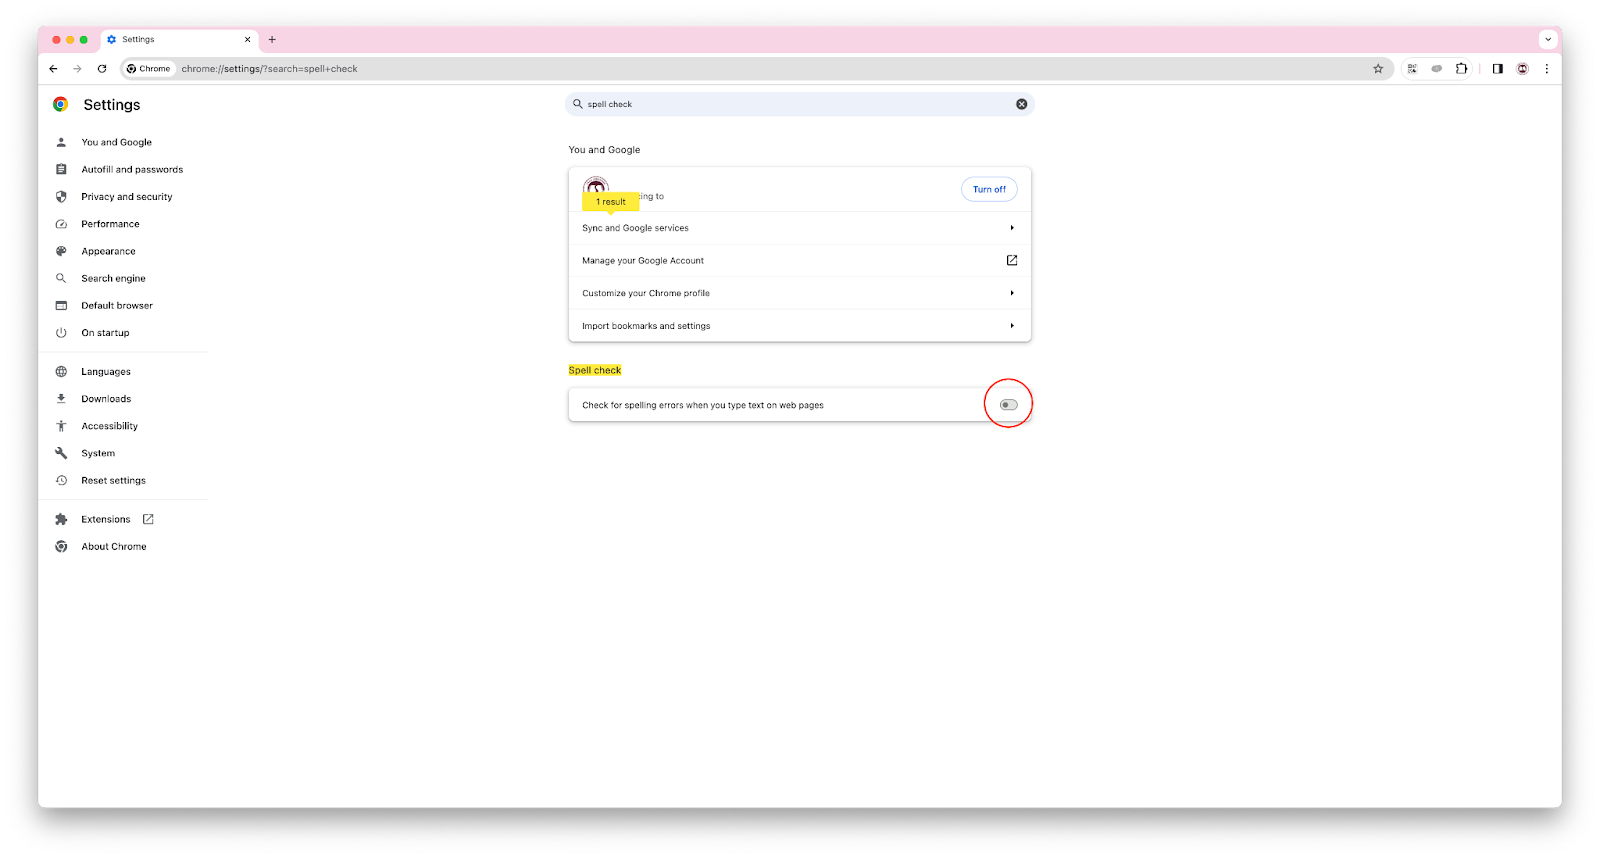
chrome://settings/?search=spell+check → use the blue toggle to disable spell check
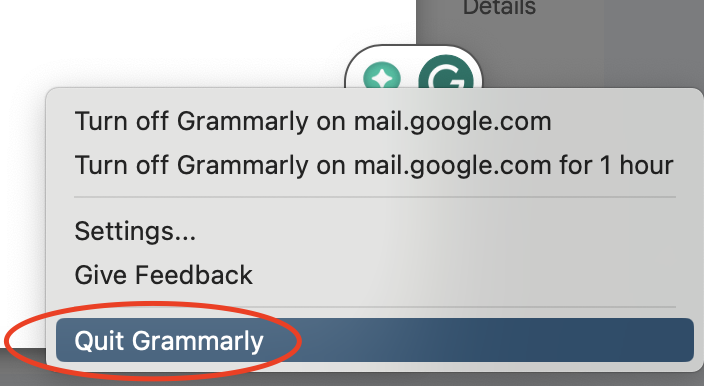
Make sure the student has turned off ALL Grammarly or spell-check apps. Right-click the Grammarly icon on your screen and click “Quit Grammarly.”
Instruct all students to unmute their microphones for the duration of the exam.
Make sure that all students have enabled the setting “Zoom Background Noise Removal > High” by going into their Zoom Audio Settings.
If a student’s background noise is too loud, tell that student to lower his/her microphone input volume in the Zoom Audio Settings.
If you have any questions or need further assistance, email itsupport@sarasch.myiqsolutionsllp.in.